Aug 15, 2023
Field Dressing an Elk in the Backcountry
One of the great things about this country is the massive amount of public land available to hunt. In total, there’s around 640 million acres of land in federal hands, much of it scattered across big sky country, west of the Mississippi River. Within these pockets of wilderness, one can gain a feeling of seclusion; It almost feels like you’ve been transported back to a time when all that covered the landscape were trees and wild animals.
It’s in these areas that elk thrive, in the high country of the western mountains. Part of the thrill of hunting elk is the process: the planning, hiking through pine forests, setting up camp, stalking for days and days. Of course, the culmination is the harvest, but what comes after is just as important as the rest. Field dressing elk is a necessary skill in the backcountry. You need to be able to quickly butcher the animal to ensure none of it goes to waste. In bear country, speed is paramount for your safety. Here’s what you need to know in order to properly clean an elk.
Get Started Immediately
It's important to get started as quickly as possible to reduce the chances of any meat spoiling in warm weather.
After the adrenaline has ceased pumping and you get a good look at the elk, you are going to realize how much work is ahead. Some bulls can weigh almost half a ton. That’s a lot of surface area to cool to prevent spoilage if the weather is warm.
It’s also time to go on high alert, especially in bear country. Grizzlies can detect an animal carcass upwind and from a distance of 20 miles. Have your bear spray within arm’s reach and be aware of your surroundings at all times.
Hindquarters
It’s best to have a partner to help, and for the purposes of this blog, we’ll assume that you do. (If you don’t, you can use paracord, trees and good ‘ole fashioned leverage to assist you.) Position the elk on its side, then have your friend hold up the hind quarter. Make your first incision under the hide near the pelvis, past the genitals and around the anus. Expose the abdomen and cut up the inside of the thigh to the knee. Cut around the knee and begin pulling the hide toward the body until you expose the hindquarter.
Now, you can remove the hindquarter. Make an incision at the inside of the leg, cutting toward the joint, continuing along the entire outside of the leg. It’ll begin separating from the body and joint. Once you’ve removed the leg, either hang it in a tree to cool or on a trash bag, which will prevent it from accumulating dirt.
Front Shoulder
If you’re going to be mounting a bull, ensure your cuts in the cape are halfway down its body, which will give a taxidermist plenty to work with. Otherwise, make an incision near the top of the neck and pull down to expose the shoulder. Cut under the armpit until it begins separating from the carcass. Set aside with the hindquarters.
Prime Cuts
Now it’s time for the backstraps and tenderloins. Remove any of the cape from the back and cut along the spine to remove the backstrap. Since you won’t be gutting the animal, make cuts through the rib cage at each vertebra, and make an incision on the top of the rib cage to get to the tenderloins. Then use your fingers to separate the tenderloins from the back bone. Be careful not to puncture the guts.
The Gutless Method
Field dressing an elk without removing the guts, also known as gutless field dressing, is a technique that offers several advantages for hunters. By utilizing this method, hunters can save time, effort, and avoid the messy process of gutting the animal in the field. Instead, they can efficiently process the meat while leaving the internal organs intact.
The key to this technique lies in strategic cuts along the animal's body to access the meat without compromising the quality. Hunters start by removing the hindquarters and front shoulders, followed by the backstraps and tenderloins. This allows for easy retrieval of the most prized cuts of meat. By mastering the art of gutless field dressing, hunters can streamline their game processing, reducing the weight to carry out of the field and preserving the high-quality meat that elk hunters eagerly anticipate.
If you're in need of a visual, Fred Eichler demonstrates the gutless technique on his YouTube channel.
Wrapping Up

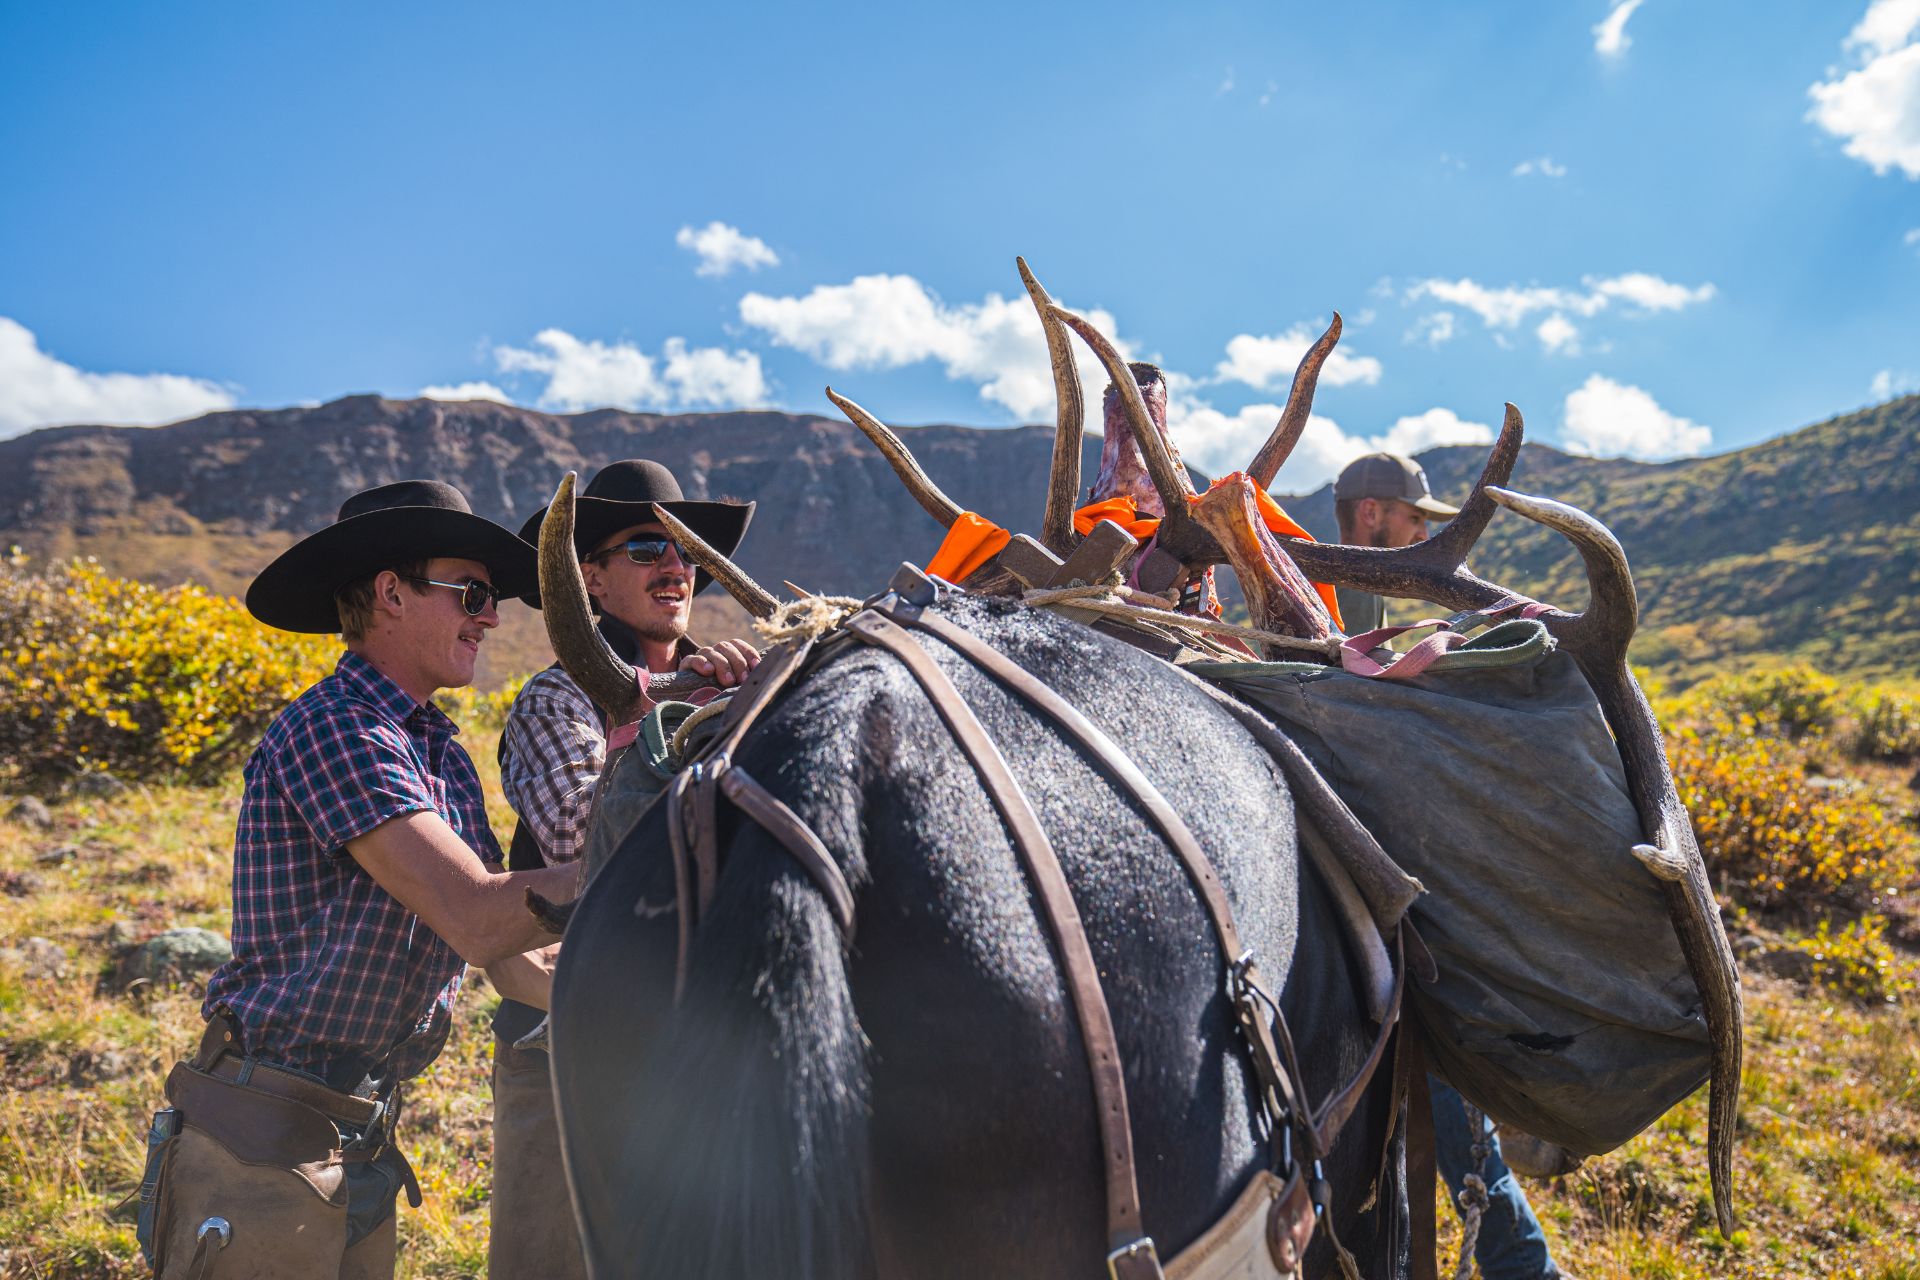
When field dressing an elk, remember to pack out the meat first, then the horns.
Flip the elk over and remove the other shoulder and hind quarter. Lastly, remove rib and neck meat. These are some of the finer cuts of the animal, which can be used to make a nice stew. But that all depends on how much you can carry back to camp. If it’s close and you can make multiple trips, by all means, take as much of the animal as you can. Skin up the neck and begin removing the cuts of meat along the spine. Again, if you’re mounting a bull, you’ll need to remove the head after carefully skinning up the neck.
At this point, you should decide how much weight your party can handle. Deboning the meat will reduce weight and allow you to carry more. If your trek back to camp is a few miles, it’s best to remove the bones. When you’re finished, wrap the meat in game bags or trash bags and secure them in your pack. Hang any meat that you can’t carry on the first trip from a tree to keep away from predators before you return to retrieve it. This includes the rack. You owe it to the animal to always pack out the meat first, trophy second.
All that’s left is packing the animal out. Again, be sure to have bear spray close by and be aware of your surroundings. When you get back to camp, a fire, hot skillet, and fresh tenderloin seared just right is a perfect way to end a trip of a lifetime.